
Payment Successful!
No POST data
Payment Failed.
In this tutorial, you’re going to learn how to take Stripe payments on your WordPress website.
The number 1 reason to build a website on WordPress is the fact that there is a plugin for pretty much every scenario.
Just like the App Store has “an app for that” the WordPress plugin library “has a plugin for that”.
So when you decide to monetize your website in a unique way that WooCommerce doesn’t fit for, a plugin for Stripe is what you need.
I have tried a few Stripe integration plugins in the past and they all work as expected. A few settings and away you go. The only bit that annoyed me was that there was no place to add custom CSS class names to the buttons to make them fit my brand. The other thing was that the free versions never had the subscription option.
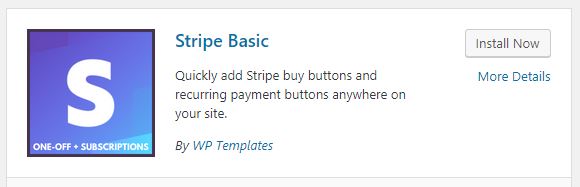
Well, now there is a basic Stripe plugin from WP Templates Store.
Features:
- Simple setup
- Buy now buttons
- Add custom CSS classes to buttons
- Add recurring payment buttons
- Error reporting
It has everything I want or need to take simple payments and recurring payments. Awesome.
What is Stripe?
Stripe is an online platform that allows easy integration so that you can take payments directly from your website. Unlike PayPal (which is still an awesome alternative) you stay on your website when taking payment. PayPal directs you to their site, takes payments, then redirects you back to your site. Stripe does it there and then, then redirects you to a thank you page.
To create a free account go to stripe.com.
Before we start the tutorial, you will need these things!
#1. SSL Certificate on your hosting. To check if you do, open up a tab and go to your site. Your URL needs to start with https.

#2. A Stripe account.
#3. A WordPress website. If you would like to get started with WordPress AND want to do the building yourself, WP Templates are doing a great introductory offer.
#4. Stripe Basic plugin added to your site.
Setting up the plugin
Firstly, you need to add the plugin to your site. A few very simple steps to do this:
- Login to the admin dashboard of your website
- Click Plugins > Add New
- Search “WPtemplates Stripe Basic”
- Click Install, then Activate once it has installed.
Once it’s activated, you’ll see a new menu item to your left called “Stripe”. Click on that to get to the general settings. Here you will add your test and live keys from your Stripe account.
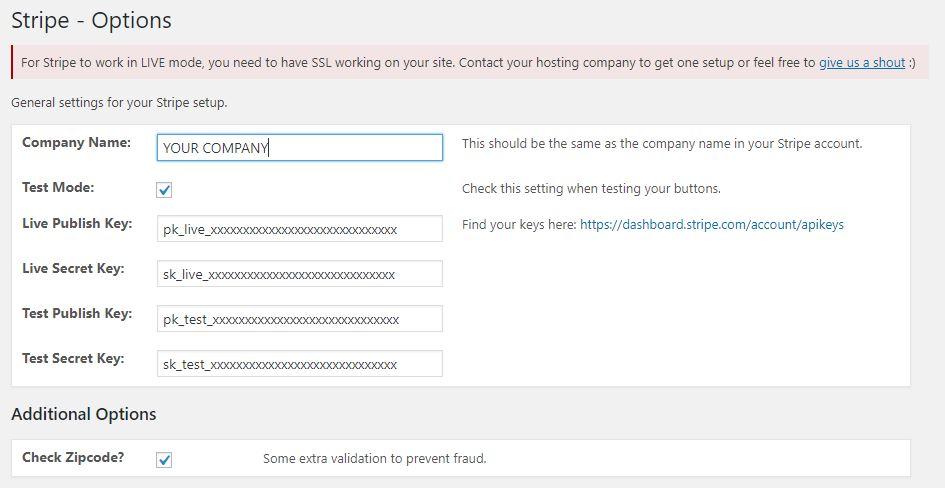
Fill in the details and click Save.
NOTE: We’re going to keep test mode clicked until our buttons and created and set up.
Now you are ready to create your buttons!
Creating a BUY NOW button
Sorry, one more bit before we create button… you’ll need 3 pages.
- The page where the button will be placed.
- Success page: where the person will be redirected when the payment is a success
- Fail page: where the person will be redirected if the payment fails for any reason.
Ok, back to making the button!
In the left menu, you’ll see the Add New option. Click that.
You’ll then see this screen:
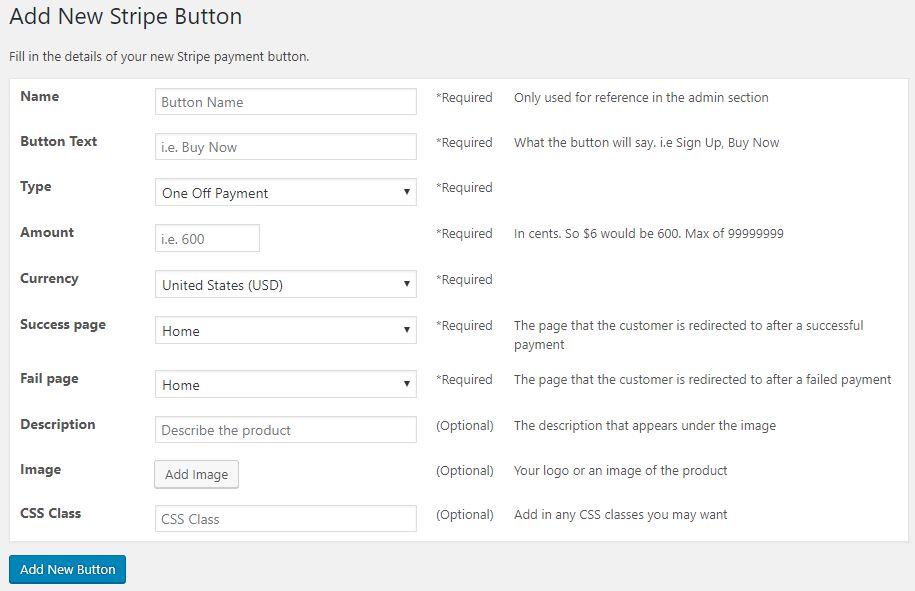
Going through the options:
- Name: This is just for your benefit so you can be descriptive so you know what the button does i.e. “$10 one-off for coaching call”.
- Button text: This is the text that appears on the button so something like “Get Your Coaching Call Now”.
- Type: As we are making a quick buy now button, we can leave this at One-off Payment.
- Amount: This is done in cents so $10 would be 1000
- Currency: Choose your site currency. You can have buttons for each one if you want, but Stripe can handle people paying from European banks to a US Stripe setup.
- Success page: Select the page you want people to see when they successfully pay.
- Fail page: Select the page you want people to see if the payment fails.
- Description: Optional. This is some text that sits at the top of the Stripe payment popup.
- Image: Optional. You have the choice to add an image or icon for the top of the popup.
- CSS Class: Optional. If you don’t want the classic blue Stripe button style, add the same classes your usual website buttons use.
Once all these are filled in, have a click of that Save button. Now click on Stripe Buttons on the left menu to get the shortcodes you need to add the buttons to the pages.

I’ll now go through the small tweaks of making a recurring payment button…
Creating a Recurring Payment button
So, the steps are pretty similar to the one-off payment button but when you change the Type option from One-off to Recurring Subscription.

- Billing Cycle: How often will payments be taken out?
- Product / Subscription Name: This needs to be unique. Once you add a product name such as “Monthly coaching calls” you can’t use that name again, so the more descriptive the better here.
The other difference on a recurring payment button is that once it is created, you cannot edit it. This is to keep things consistent. If you do make a mistake, just delete the button and add it in again correctly.
Ok, now we have our buttons, let’s add them to pages on our website!
Adding your buttons to your website pages
Firstly, go to Stripe Buttons and copy the shortcode for your button

Next, go to the page you want to add your button.
If you are not using a page builder, you can just add your shortcode into the content box of your page or post. If you are using a page builder, then add the shortcode into a text area. These execute the shortcode function.
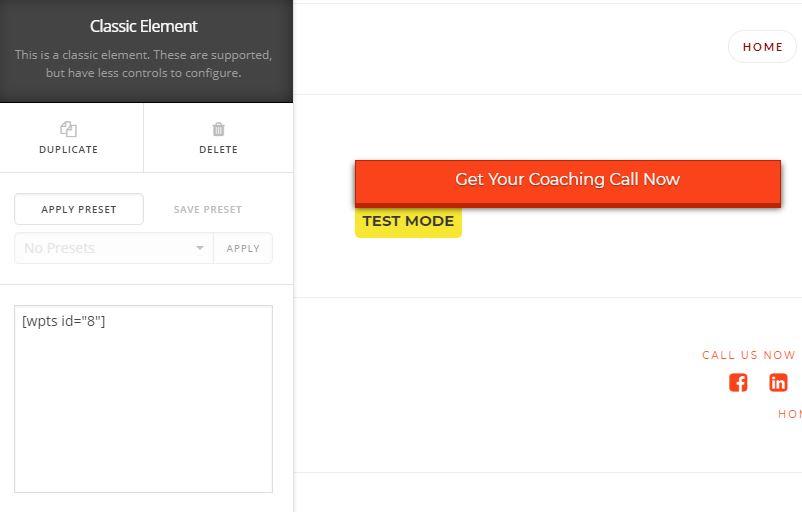
I use X Theme and their Cornerstone page builder so this is what my setup looks and works like.
You’ll see that we have the test mode warning under the button which is great, as that is the worst thing to forget when publishing your new payment page 🙂
Style the page as you want. If you are making a landing page check out WP Templates Landing Pages templates for some inspiration.
That’s all you need to do to add the button.

Success and Failure pages
Why do you need these? Stats. Upsells. Turn a failure into a positive action. Facebook Pixel. Google Goals.
Having separate pages means you can get very accurate stats on successful conversions.
Success page: On this page, style it as you want maybe saying “Congrats on your purchase” and tell the new client what the next steps will be, like when they will receive their goods etc.
Add in the shortcode:
When this page is shown, the customer will get a confirmation of what they have just purchased.
Failure page: This page is there if anything should fail.
Just add in the shortcode:
NOTE: You will have a log of any failures that do happen in the Stripe > Error Log page. Here you will see the error message and the email address of the person that experienced the failure. Great for you to get in touch with them and make it up to them.
Testing
We’ve gone through the steps of creating buttons and adding them to your website. Now we need to test them!
So, go to the page with the button on and click it. Stripe has a standard card number for you to use:
Card Number: 4242 4242 4242 4242
This will generate a successful test payment. The other details like date, email and CVC number can be whatever you want.
You will see this:
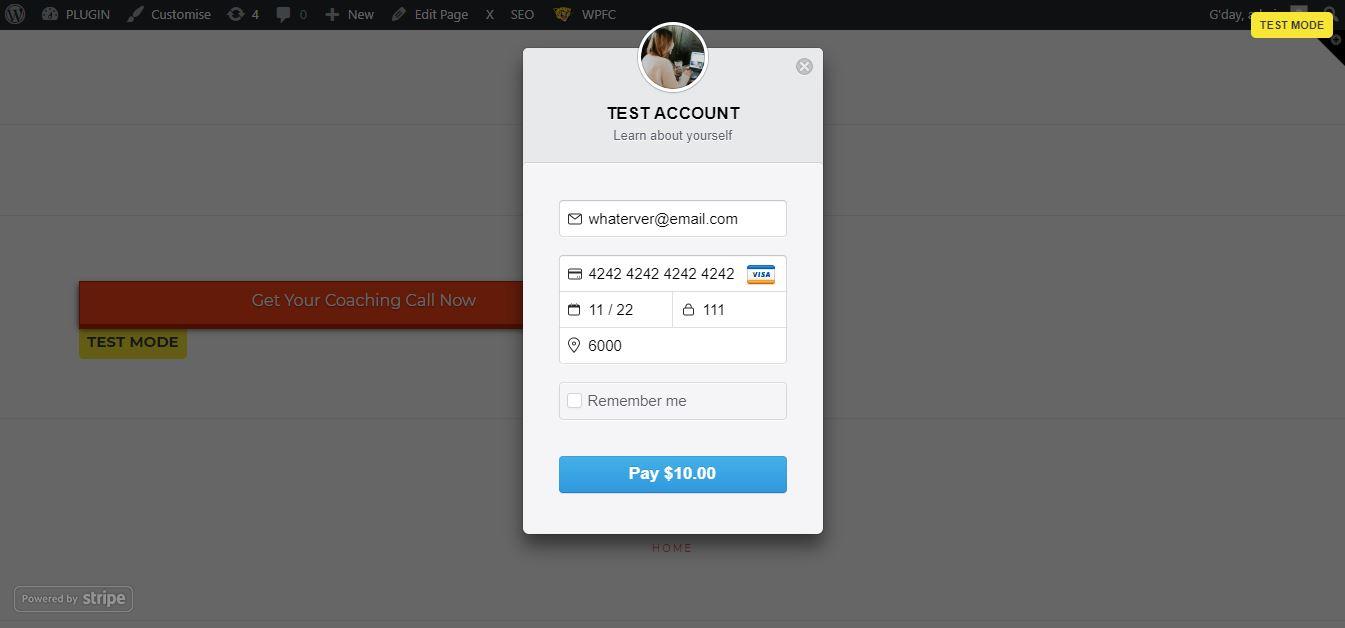
Click Pay. You’ll then be redirected to the success page on your site.
Once you are happy with that, you are done!
NOTE: TURN OFF TESTING MODE!
Conclusion
So now we’ve gone through all the steps to turn your website into a money making machine!
ALSO – Now you have your buttons, check out this tutorial on how to add your Stripe buttons to the X Theme pricing tables.
I hope this tutorial helped and if you have any questions relating to WordPress, Plugins, Digital Marketing then please feel free to get in touch!
You also have the option of having me as your full time website manager! Check out some of the available packages we can offer!